
(1) easy to build
(2) easy to store
(3) super cheap.
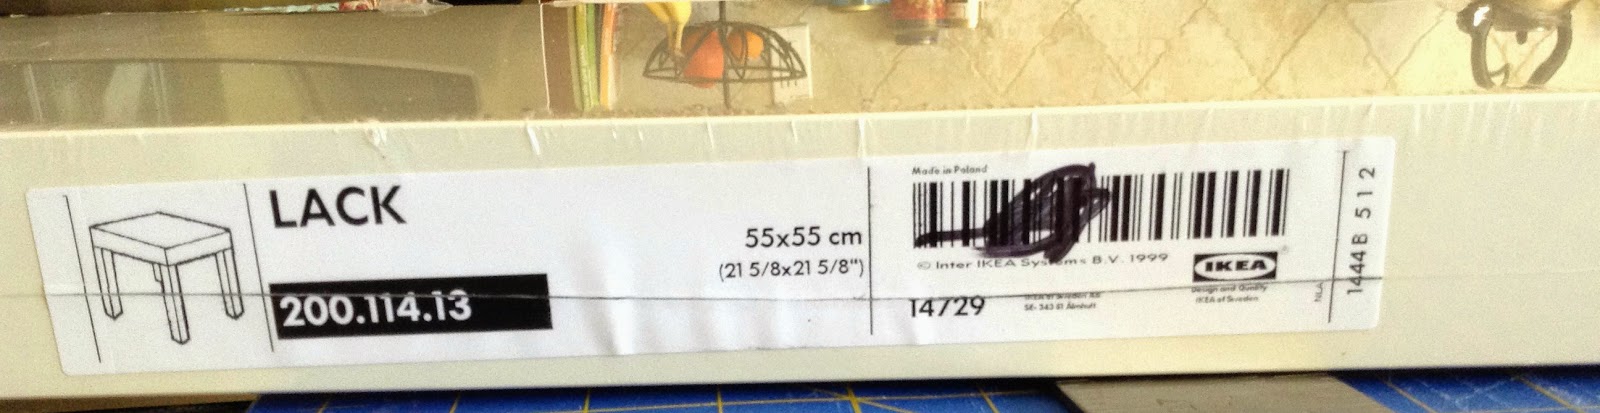
I stumbled across an Ikea Lack end table on clearance for $4 last week and picked it up hoping it would be something I could use for this project. Even if I'd had to buy it, the sale price was only $7, so that wouldn't have broken the bank. I've also seen these often on Craigslist.

The only other supply I needed to purchase was something to cover the top. Originally, I wanted to use plexiglass, but after pricing the size sheet I would need, I decided that the $25 price tag was more than I was willing to spend. Instead, I picked up a sheet of plastic paneling that covers florescent light fixtures. It cost $9.

The last item I needed was lights. Buying short florescent light fixtures was going to bump the cost back up, so I snagged a strand of 100 white Christmas lights.

Now, the how-to:
The top of the Ikea lack table is actually filled with corrugated cardboard and covered with a thick layer of laminate. I measured about 2" in from each side and started scoring through the laminate with a utility knife. This took a little while and a little muscle. Once I got through the laminate, I had to stick the end of my utility knife in and wiggle it back and forth to force through the final underlayer of laminate.

Pry up the laminate. You'll see the cardboard beneath.
.jpeg)
Scrape out the cardboard. Get rid of all the loose bits clinging to the glue at the bottom.
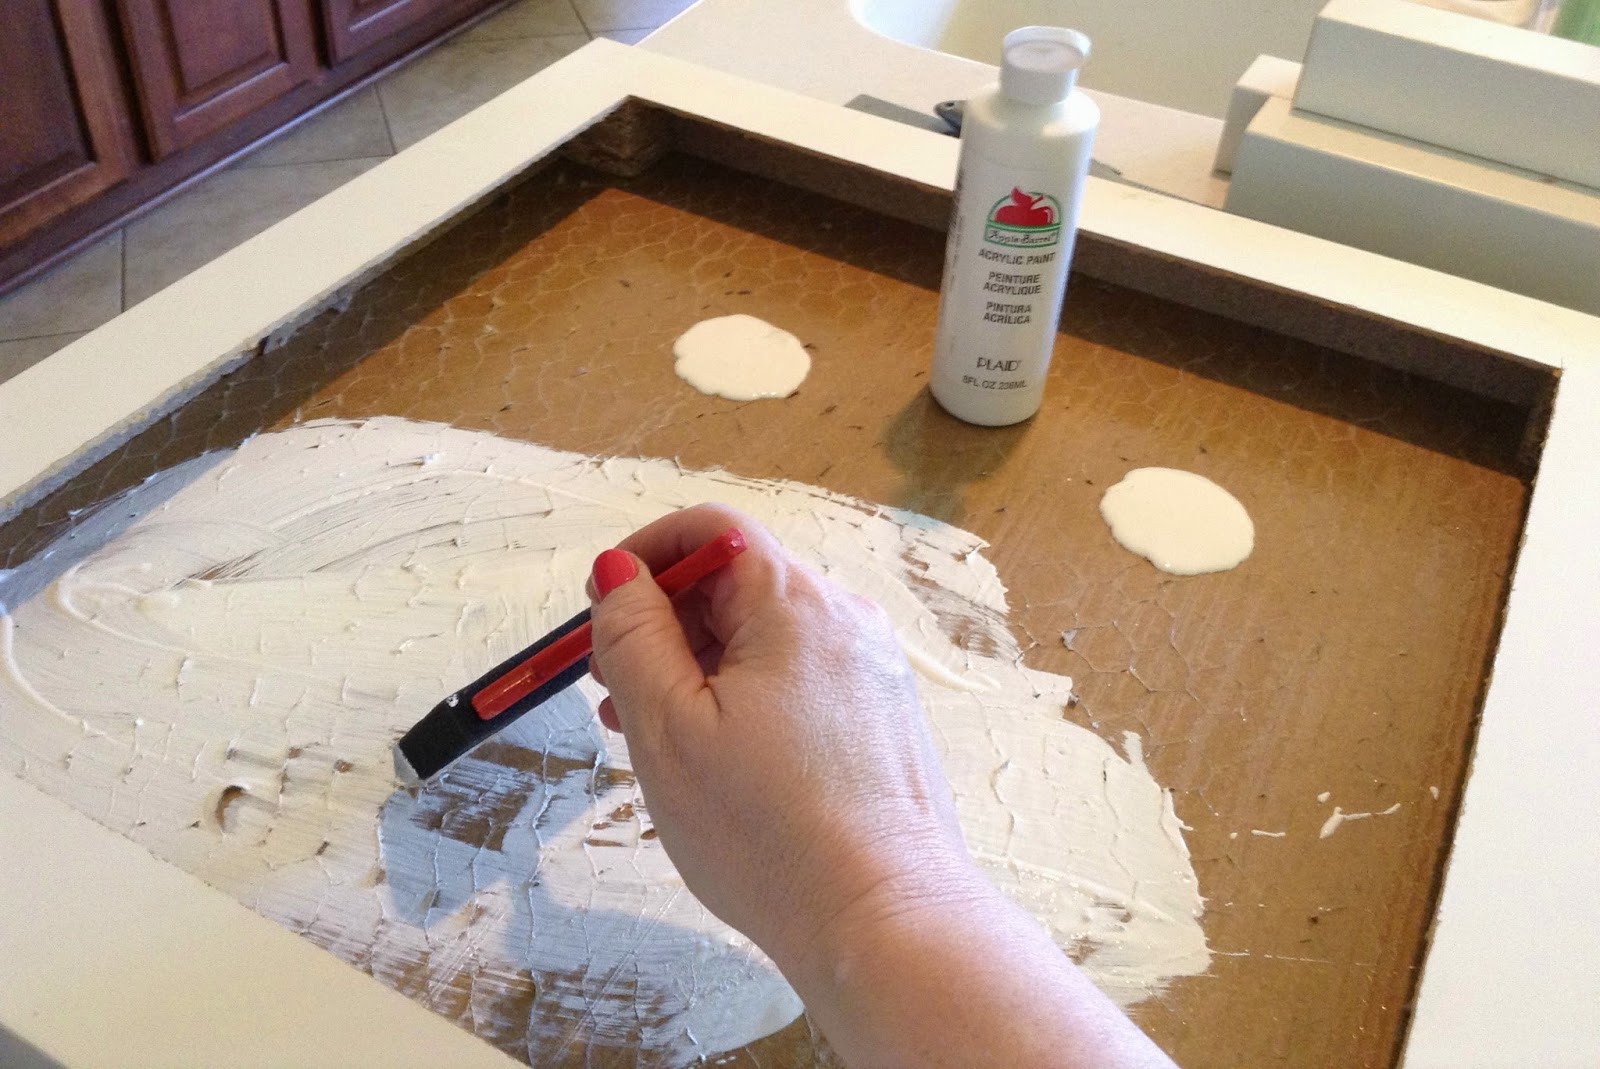
Paint the bottom with white craft paint and a sponge brush. This does NOT have to be perfect. You'll never see it. You just want to white to help reflect the light.
.jpeg)
Screw your table legs in place.

Now, the tricky part. Because I didn't want to invest in a battery pack, I had to create a hole large enough to fit the female end of the light string. The largest drill bit I own is 1/2" which wasn't large enough. So, I did a combo of drilling a couple of holes close together and then using a large flat head screwdriver as a chisel and hammer to break away the remaining wood. Is it pretty? No. Is it functional? Yes. And I figured since it would be facing the wall, I'd just touch it up with a little white paint and no one would be the wiser!
Feed the lights through the opening leaving just the plug portion exposed to attach to an extension cord.

Arrange the lights across the surface. To keep them from shifting, I tacked some of the cords in place with a little clear packing tape. If I'd had a choice of lights, I would rather have used ones with white cords. But finding Christmas lights in March is not easy! I decided I either had to be less picky and ignore the green cords, paint them, or wait to build this once stores started stocking for Christmas. I voted for ignoring!

Now, I had to cover the top. Here's what NOT to do! Sigh. The width of the light panel was a little less than 1/4" larger than I needed. I elected to let it overlap each side about 1/8" instead of trying to cut the brittle plastic. The problem was that the entire panel was 48" and I only needed two pieces measuring 21 1/2". At first I tried scoring it with the utility knife with no luck. We're talking brittle hard plastic.
.jpeg)
So, I finally got frustrated and slowly bent the two pieces together *hoping* that it would just split in half. Well.....it did, but not evenly. One side was fine. The other had a corner break off. And shards of brittle plastic shooting all over my kitchen. Yikes. I do NOT advise being impatient like me! In retrospect, I would have wrapped masking or painters tape on both sides of the plastic and either tried to cut it with a jigsaw or a router. It still might come out a little uneven, but I suspect it would be better than my mess. If you have the money (or are too perfectionistic to live with imperfections!), order plexiglass or an acrylic sheet cut to size. If you go the route I did, just know that it will NOT be perfect. But it will work. If I worked in a clinical setting where we might use this table many hours a day, I would spend the extra money. But since I'm in a classroom setting where we will only use it in short increments across the day, this will be durable enough for our purposes. Use your judgment.
Because of the flex of the plastic, I laid the two bumpy sides together, so the strength would be doubled. It worked well and also helped by bluring the view of the light strings.
Last, apply a little tape on the corners of the plastic, lay it in place and drill a hole in each corner. Peel off the tape, clean away your sawdust, and use wood screws to attach.

We are using our light table with translucent geometric shapes. Magnatiles are on my wish list to add to our light table stash. We also plan to do artwork by covering the table in translucent plastic wrap (to prevent seepage) and then use additional clear plastic sheets to paint or draw on. The play of light on different art materials will be great fun!

Questions? Post them below in the comments! Happy light table building! ~Kelley